View Administrator Guide
Configuring the Customer Self Service Portal
Configuring Portal is a step through wizard and which makes it so easy to configure and manage it every time! There is just 1 step from Portal, which is, to tell it the SugarCRM location which we will be using.
Locate file config.php on your portal unzipped folder.

Change the sugar_url to match with site_url from config.php of your SugarCRM copy. And use sugar_user and sugar_password of an admin user.
Let's now configure Portal from within SugarCRM!
Login as Admin user > Go to Admin > Scroll down to Portal Configuration block and configure license key and up on successful validation Proceed to Wizard.
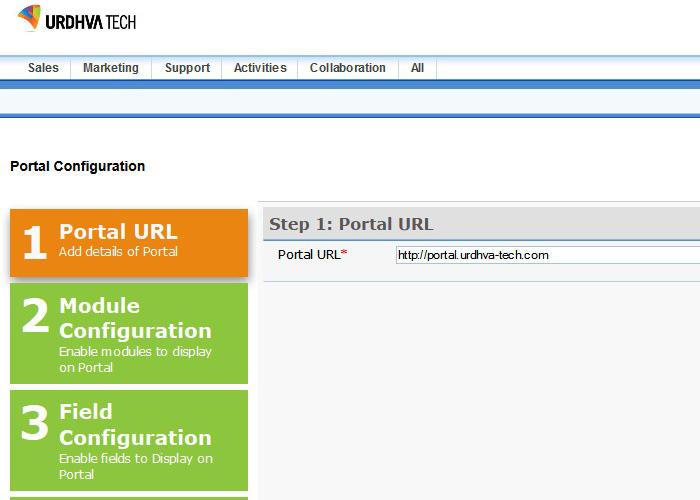
Step 1:Let SugarCRM know what your portal URL will be, i.e. where you will host your portal. For example, http://portal.urdhva-tech.com
Step 2:Configure how many modules you want to grant access to, to your customers. For now, portal supports basic SugarCRM modules, like, Contacts (Just customer’s own profile), Leads, Cases, Bugs, Newsletters (Customers manage subscription on their own). If you wish to add a custom module to the portal, contact us at This email address is being protected from spambots. You need JavaScript enabled to view it.
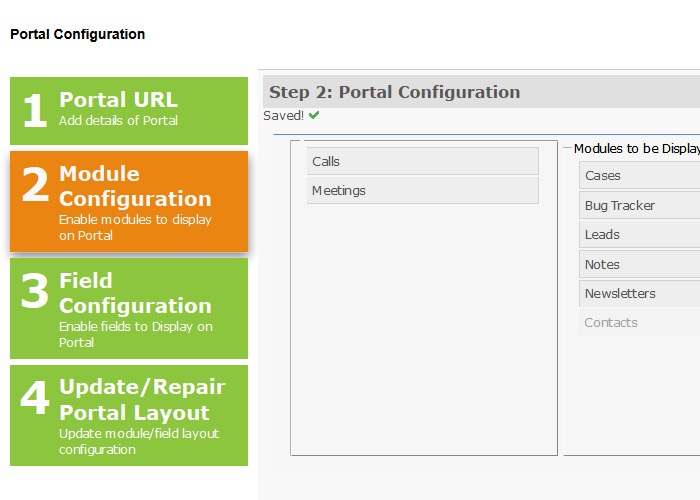
P.S. Notes module is found as subpanel under Cases and Bugs module. Customer can request a Call/Meeting for assistance.
Step 3:Hide the fields you don’t want your customers to see. Here you can restrict the permission of editing and deleting a record too! You have 2 views to deal with, Edit/Detail and List view, by default; we use what you already have in those views in SugarCRM.
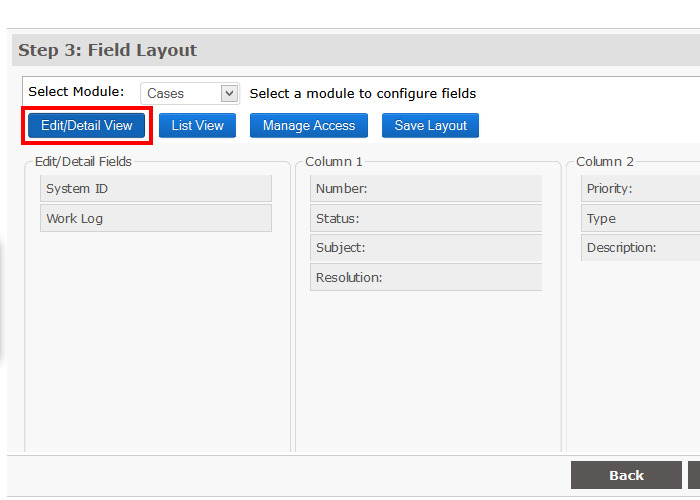
After all layout changes for a module, you must click on Save Layout button.
P.S. Supported field types, i.e., name, varchar, phone, bool, enum, multienum, text, date, datetime, datetimecombo, int.
Note :If you want to allow your customers to reset their password on their own, make sure the field “Portal Password” is available in Edit View in portal.
Step 4:Whatever you have configured in previous steps, let’s push to Portal! Click and wait until done!
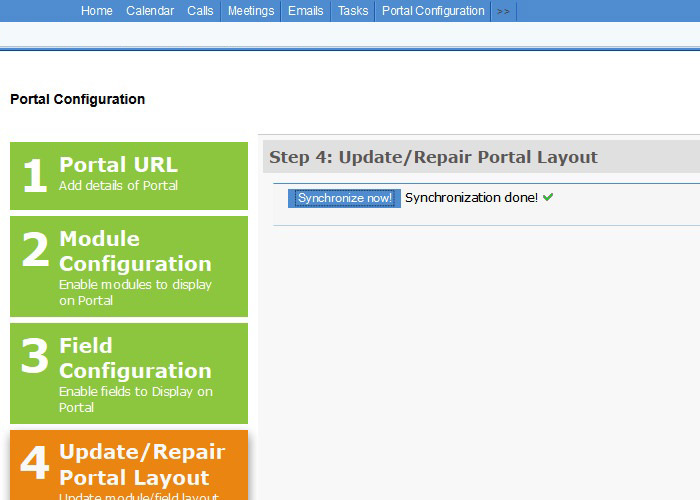
Note: If you have any problem in synchronizing, first check config.php of Portal package, it must match with SugarCRM site_url. Secondly, check the Portal URL you provided in wizard step 1. Thirdly, make sure that the SugarCRM URL in your browser matches the site_url defined in your SugarCRM config.php.
Portal setup is almost done! The views at least!
Let us now give access to customer!
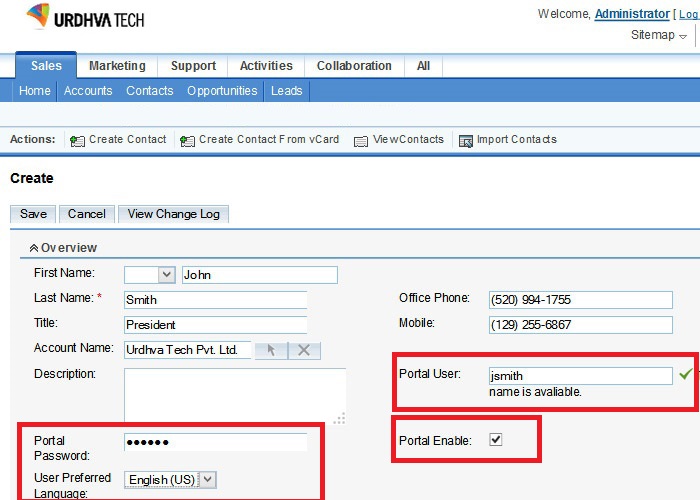
Go to a contact; find new fields, Portal Enable, Portal User and Portal Password. Have Portal enabled check, give a portal name and system will check for its existence, and let you know if it’s available, and give password.
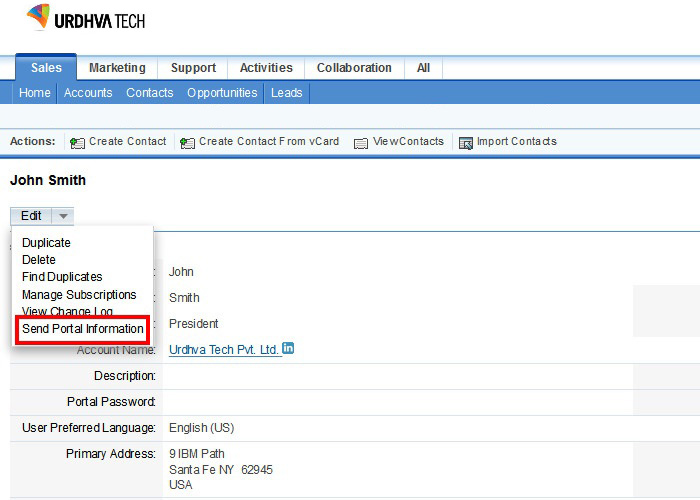
Send them the credentials right from Detail View. Click on “Send Portal Details” button and system sends an email to customer with predefined email template.
Have a bunch of contacts that you want to create portal accounts for and want to save a large amount of time?
Mass assignment of Portal Users:Go to Contact’s list view, select contacts, or customers as we see it, to whom you want to give access for portal, select “Generate Portal User”.
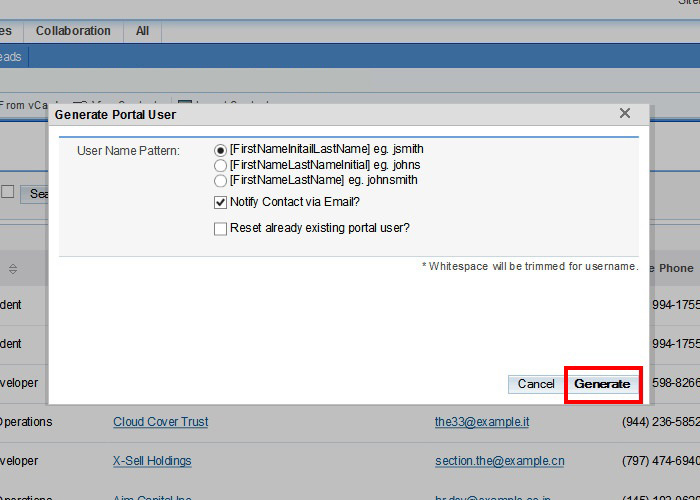
This will ask you few things like...
Username pattern, for example for contact having first name = John and last name = Smith:
1. First name initial last name, that makes jsmith
2. First name last name initial, that makes johns
3. First name last name, that makes johnsmith
Checkbox for confirmation on sending notification to customer on successful creation of portal information. (Impressive, yeah!)
Checkbox to reset username and password for customers who already have a username.
Pretty cool, isn’t it?
Note: If you choose to use initials, there must exist a corresponding name, else system will not create username for that customer.
We have installed 2 email templates, one for Portal Forgot Password facility and one for sending out Portal access information to customer. You may change those templates from Emails > Email Templates.
If you have suggestions on making it simpler than it already is, please let us know!
Notifications from Portal
As a sales representative, you will receive some important notifications from Portal, when your portal user registers a Bug or creates a Case or Requests a Call or Meeting, or generates a Lead.
As admin, you will receive notification when new customer signs up to access portal.

