
View User Guide
Using the Customer Self Service Portal
The Urdhva Tech Customer Self Service Portal allows you, the portal user, to interact with a vendor so that you can submit and review bug reports and support cases. In addition, you can also view and update the contact information that the vendor has for you so that your data stays current in their system. The vendor has the option to customize what fields and information is available for you in the portal. This document will explain how to best utilize all of the functionality available in the Urdhva Tech portal.
Login Page
The login page is where you will enter your user name and password that will grant you access to the portal. The user name and password will be provided to you by one of your contacts at the vendor who hosts the portal.
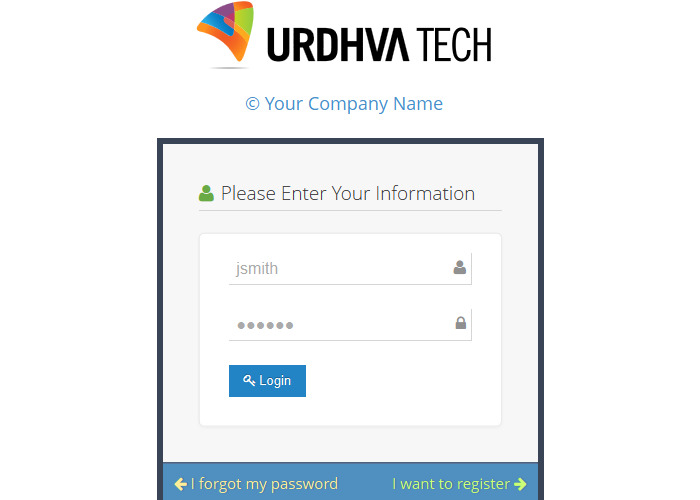
If you are not already working with this vendor, you can sign up for the portal by providing contact information. Registered portal users can also use the Forgot Password link if need be.
Forgot Password
If you have misplaced your password and don’t seem to remember too, don’t worry! Click on “I forgot my password” and your vendor will send you a new password ASAP.
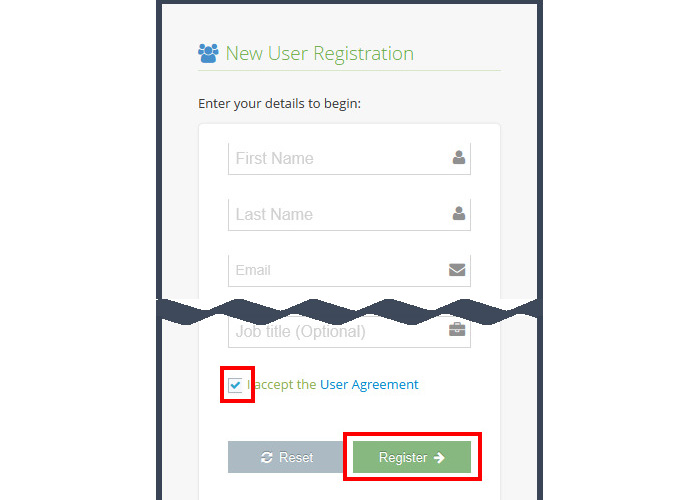
Sign Up
If you have not yet worked with this vendor, you can gain access to their portal by using the "I want to register" button on the login page of the Urdhva Tech portal. After clicking on "I want to register", you will be presented with a page to enter information about yourself. Enter the necessary information and then click "Register". The information will be sent to the vendor where a representative can create your account and contact you with a user name and password.
User Interface
Once you are signed in, the portal user interface provides you with a simple, streamlined, and intuitive interface to access the information that you are looking for. Every page on the interface will contain the header.
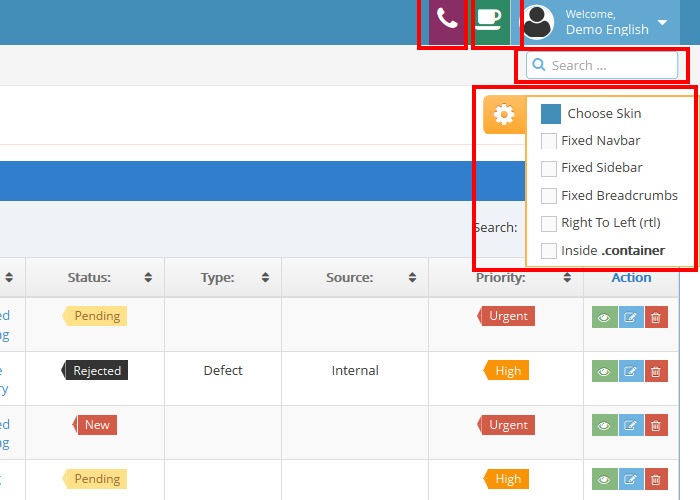
Header
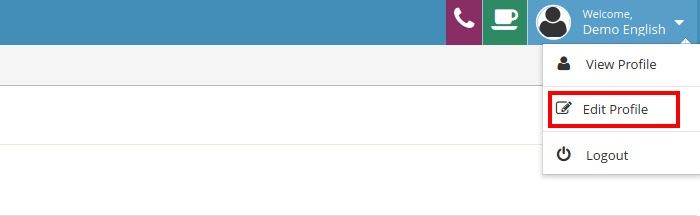
The header is shown at the top of every page in the portal. The header contains your "Company Name" and multiple functional options that will help you for "Request a call" and "Request a meeting". Also you can access your profile. You can even change the skin of the portal with color of your choice! Fix side bar and header for easy access to menu throughout your portal experience.
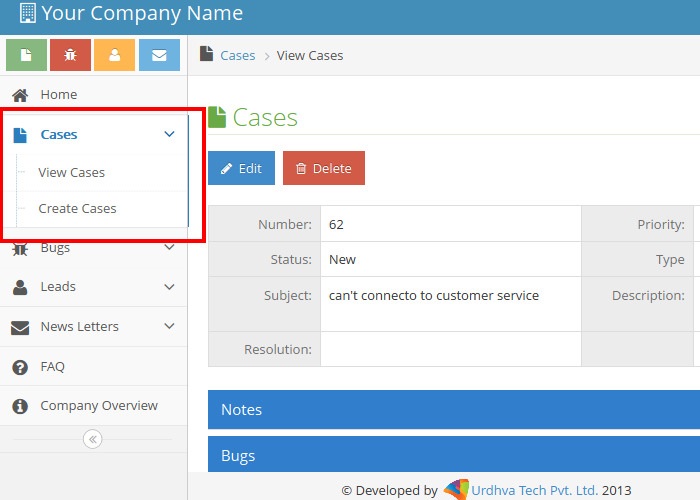
Module Tabs
The module tabs, Cases, Bugs, Leads and NewsLetters allow you to select a module in the portal that you would like to view. Clicking a module tab will give you the option for record(s) View or Create. Clicking on View, gives a list of all of the available records for you to view. From the list view, you will be able to see key fields, or you can click the record's name to open the record in detail view.
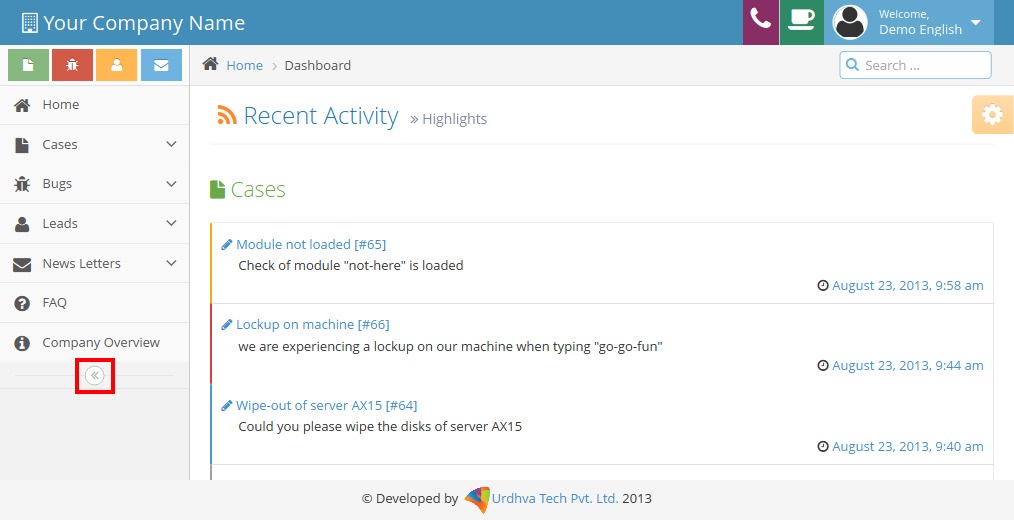
Dashboard
The home page of the portal consists of a "Recent Activity" which contains recently Added or modified Bugs or Cases up to 5 each. Click on name of the record will open Detail View and displays thorough information for that record. You can collapse side bar menu by clicking on << icon.
Global Search
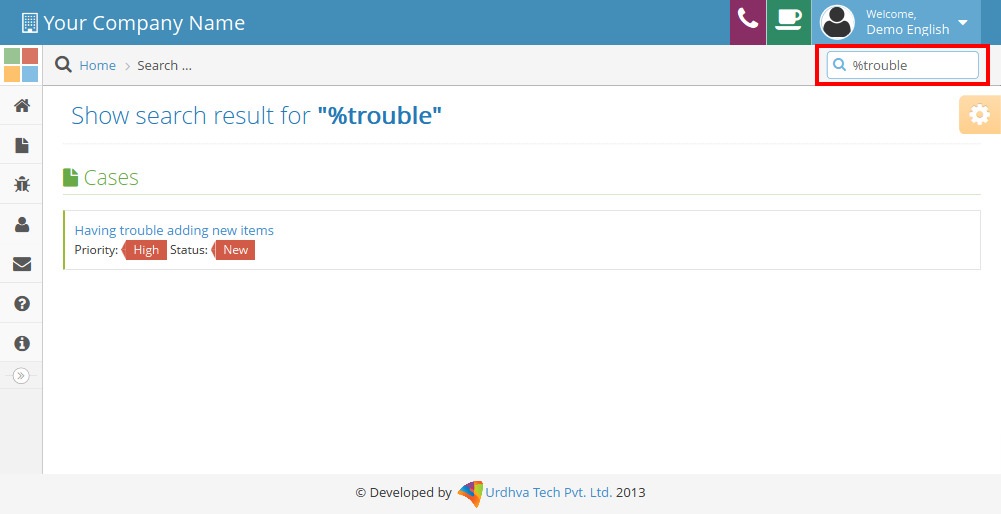
The global search allows portal users to search for information across all available records in the portal, as opposed to restricting search within a specific module. The global search bar is located on the top right hand side of the portal.
The search will search throughout following fields in each module:
| Module | Fields |
|---|---|
| Bugs | Bug Number, Subject |
| Cases | Case Number, Subject |
| Leads | First Name, Last Name |
To use the global search, you need to first enter the keyword into the search box and then press "Go" button.
Please note that the portal automatically appends the wildcard character (%) to the end of your search phrase. This allows the system to retrieve all records that start with the keyword entered in the search. If you would like to broaden the search, you can use the wildcard at the beginning of your text as well (e.g. %purchase). This will pull up any record that has the word “purchase” in the name, regardless of how it starts or ends.
Modules and their behavior explained
Bugs
The Bugs section of the portal lets you review any product related defects that have been reported to them or that vendor have reported. This module also allows you to submit any bugs that you find so that the vendor can work on fixing them in future releases. Note: Bugs are visible by all of your vendor's portal users, not just you.
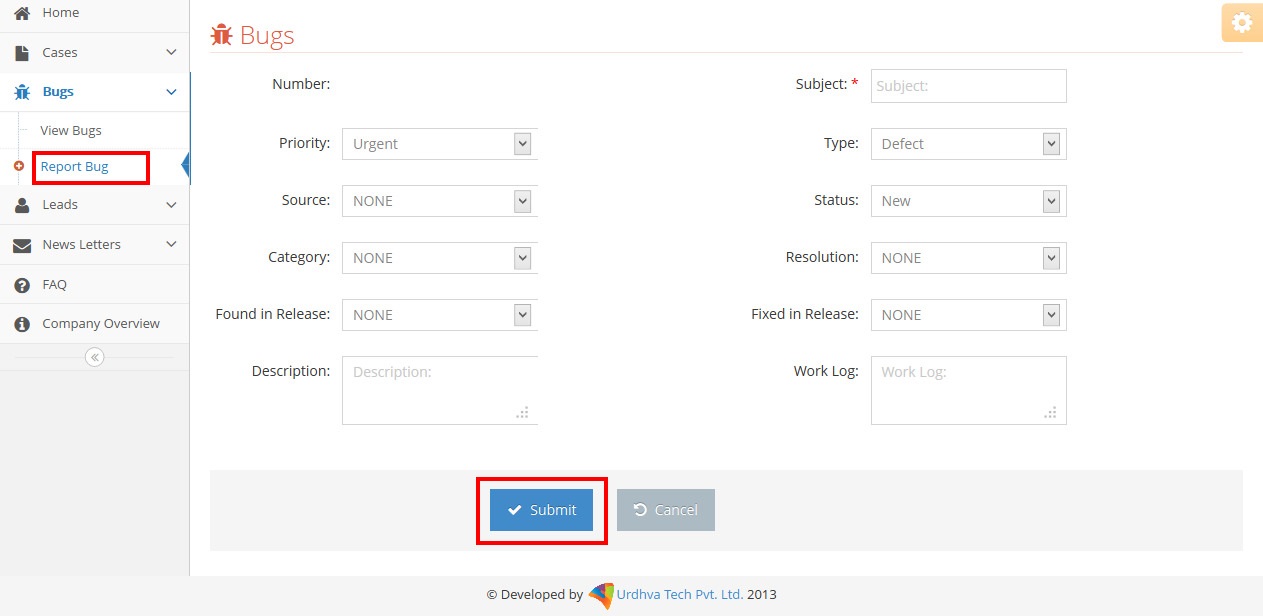
Reporting Bugs
You can submit bug via the Report Bug option from the left menu. This opens up the edit view layout which allows you to enter in all the relevant information for the bug.
Viewing and Searching Bugs
There are several things you can do from List View of bugs, like, you can filter the list by writing keywords in Search box, sort the columns(One column at a time), and play with number of records you want to see in list view! From action column, you can view/edit/delete that particular record. If you wish to delete more than one bug, select those, and use Delete button at top.
Related modules
The Bugs detail view displays thorough bug information including all bug fields followed by "Notes" and "Cases" subpanel. You can create new Note and Case related to bug.
Bugs Detail View
The Bugs detail view displays thorough bug report information including all bug fields. You can also view any notes and cases attached to a bug, which appear beneath the bug fields. The detail view can be reached by clicking a bug's link from anywhere in the application including from the Bugs list view.

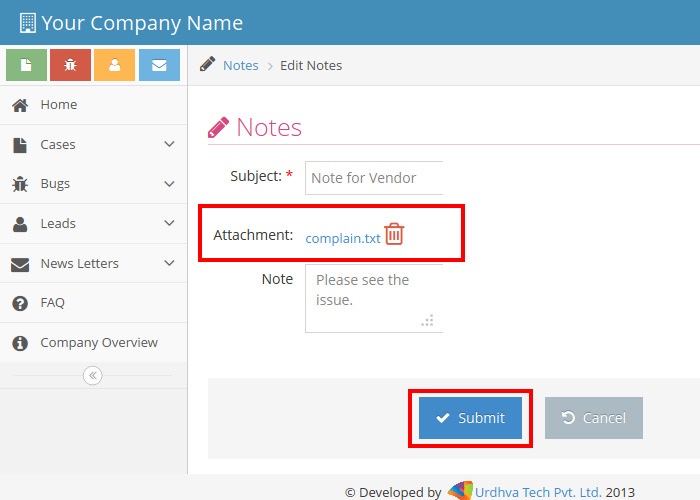
Clicking on the note's subject will lead you to note Detail View. In addition, if there is any file attachment to the note, it can be downloaded also.
Deleting Attachment
You can delete old attachment if you wish and add new one.
Cases
The cases section of the portal allows you to submit support related issues that you run into so that the vendor can work on rectifying them for you.
You can review and keep up with the status updates on the cases submitted by you.
Note: You can attach a note to a case.
Leads
The Leads section allows you to create leads for your vendor. You can review your generated leads.
Calls
In top right corner you have Telephone Icon, which allows you to “Request a call”. This sends a notification to your vendor about your request for a call on selected date and time with brief of your request.
Meetings
In top right corner you have Coffee Icon, which allows you to “Request a meeting”. This sends a notification to your vendor about your request for a meeting on selected date and time with brief of your request.
Newsletters
This section allows you to manage your own subscriptions of the newsletters from your Vendor. You can anytime subscribe/unsubscribe from or to a newsletter.
User Profile
The user profile section of the portal lets you review your contact information that the vendor has of you and also allows you to update your contact information. Making changes in this section will update the vendor's database information of you, so be sure to update this section if any of your contact information changes. You can change your password and language preference too from here.
NOTE: If you don't see any of these features mentioned above, is because it has not be configured to be exposed to Portal Users.