Blogs
July
A web-to-lead form is an essential component of marketing and sales automation. Its purpose is to capture data submitted by website visitors, such as contact information and product interest, and store it as a “Lead” record in a CRM product.
WebToModule serves a lot more than a simple web-to-lead, it allows the company to gather data to any pre-built or custom module of the CRM. With additional features and more control over the standard webforms.
Need a landing page for your next campaign? A way for your customers to create support cases ? Do your sales reps need a way to enter leads? or any way to capture data to your CRM via web form. With WebToModule you can create custom web forms for any built-in or custom module.
Let see how it is working.
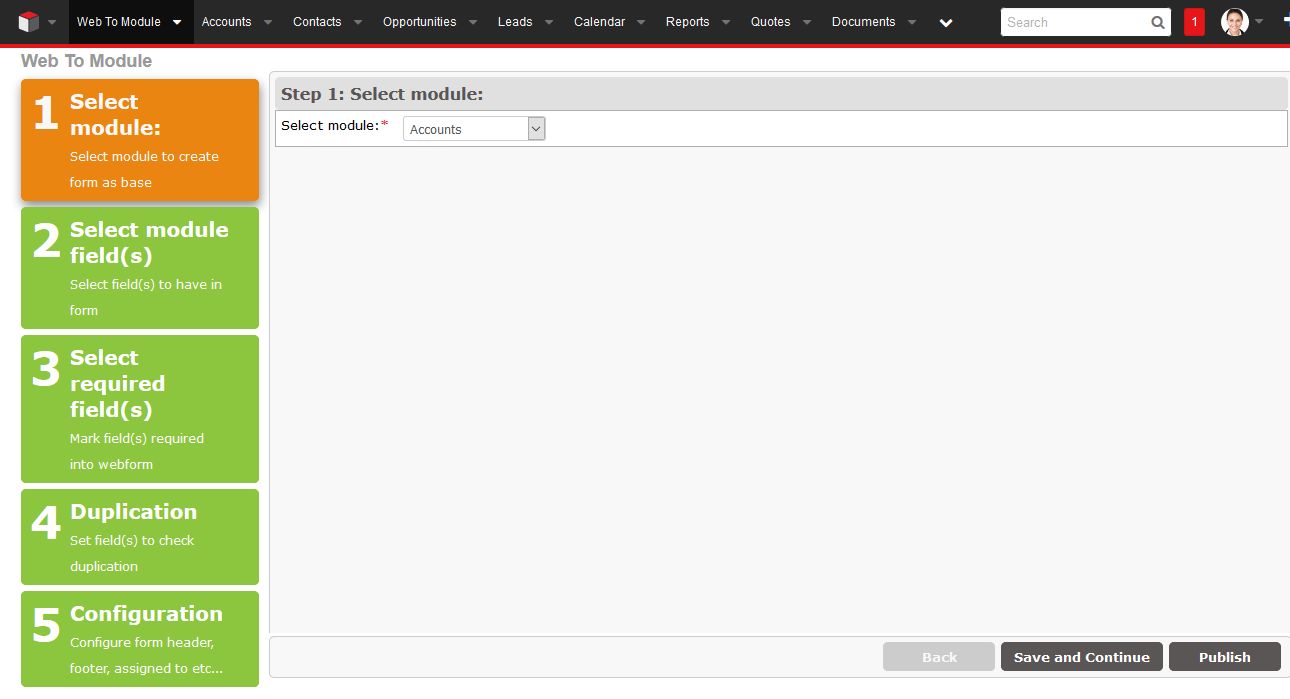
Step 1 : Select the module for which you want to generate the Web Form. The list of modules supports the built-in and custom modules, if any.
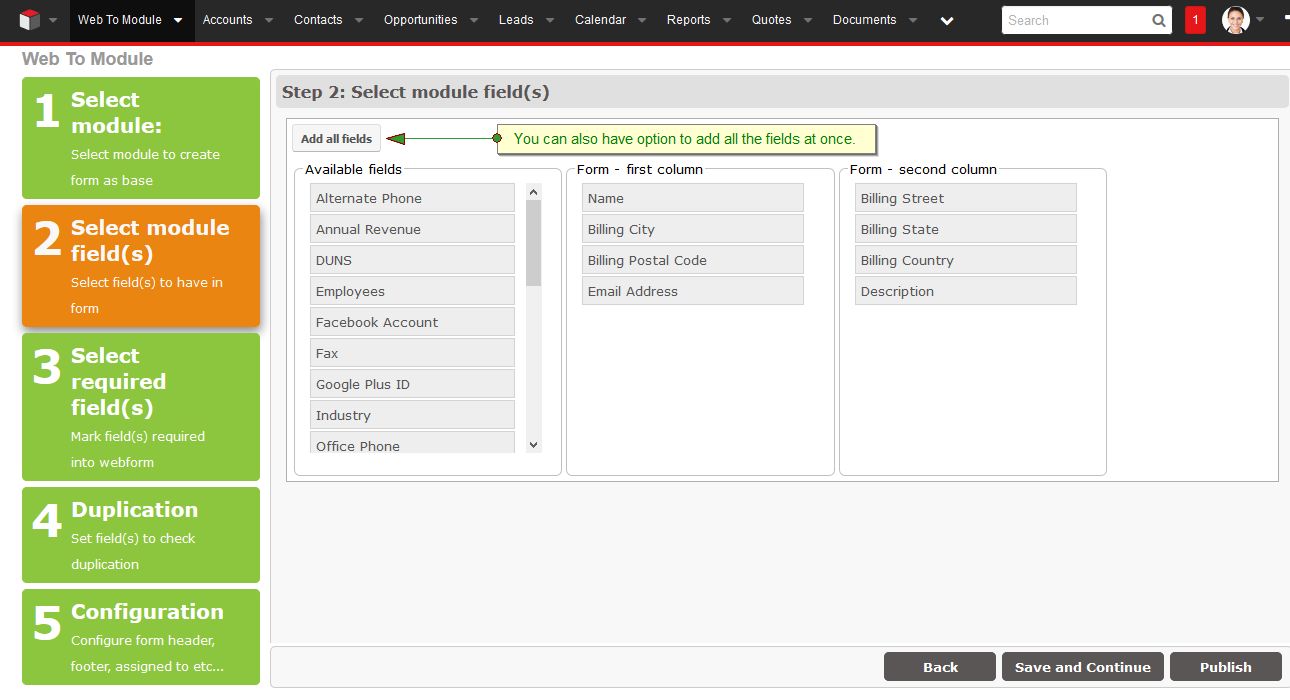
Step 2 : Select the field(s) you want to display on the Web Form.
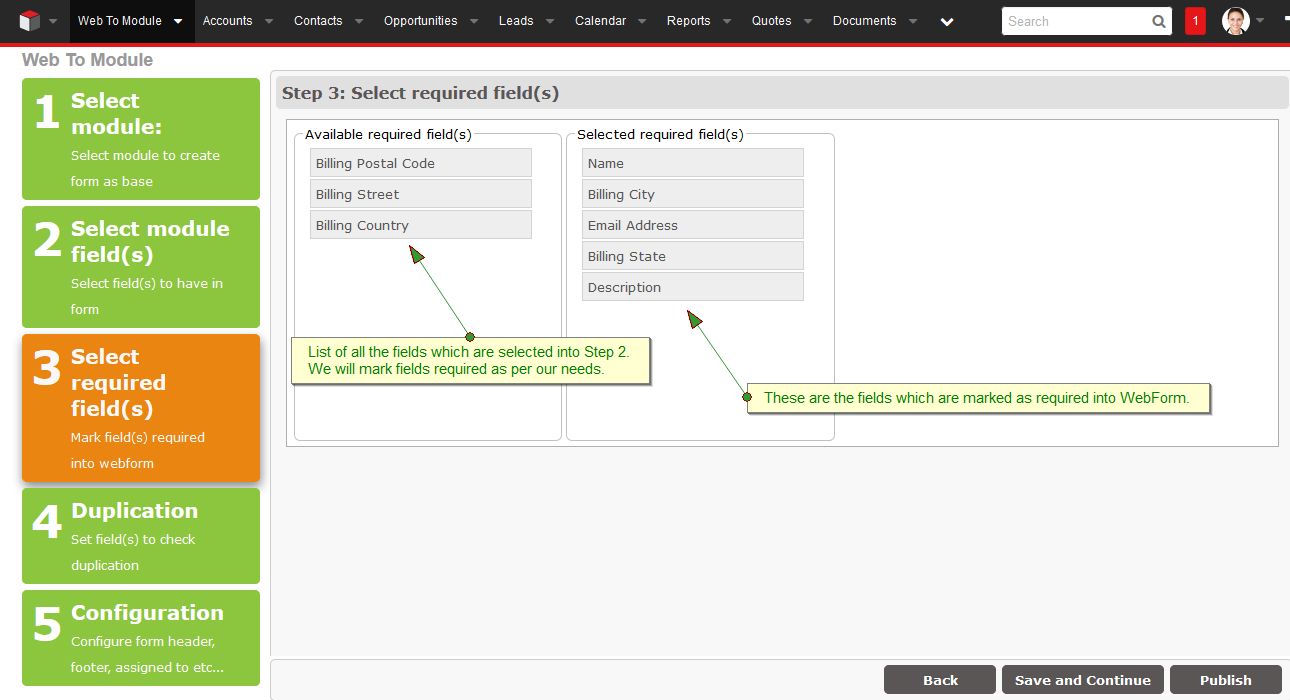
Step 3 : Out of the selected fields, mark the fields that has to be filled in compulsory.
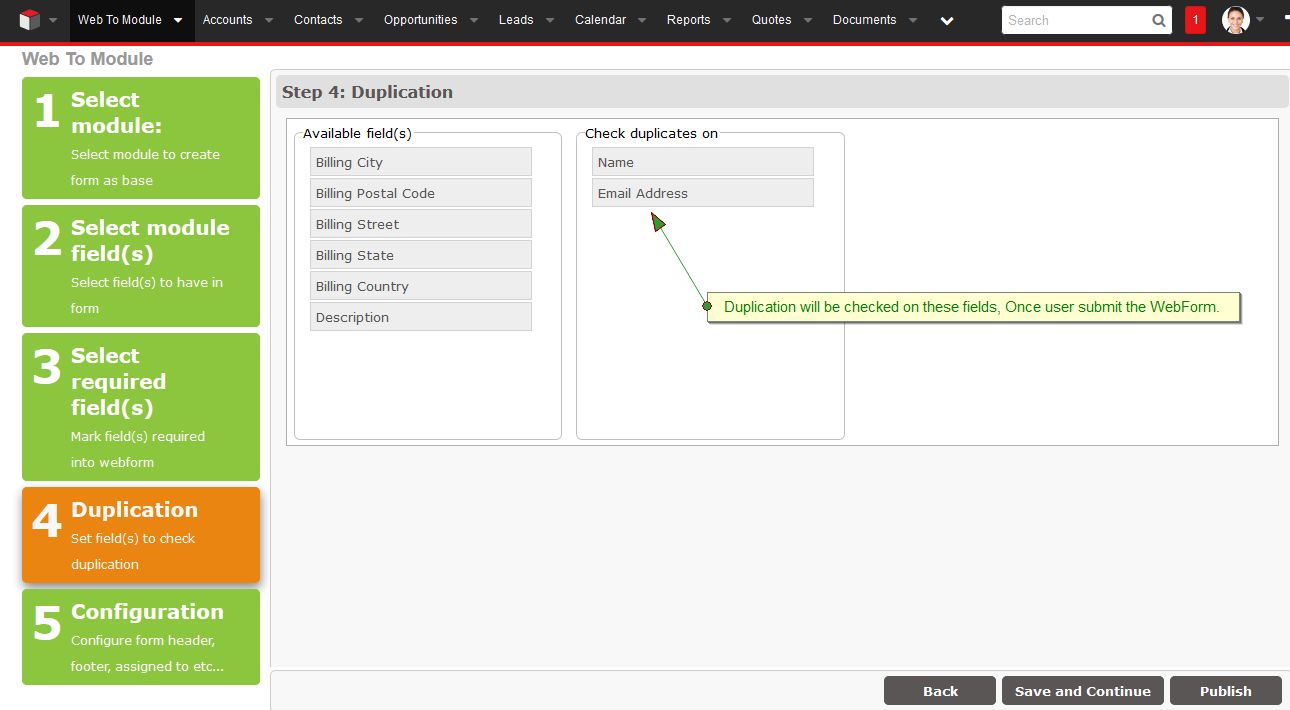
Step 4 : Select the field(s) that you want to check duplicates in CRM.
Step 5 : Add necessary details to WebForm like Form Header, Form Description, Submit Button Label, Auto-Response Template, Teams, Enable Google reCaptcha, Redirect URL, Form Footer etc…
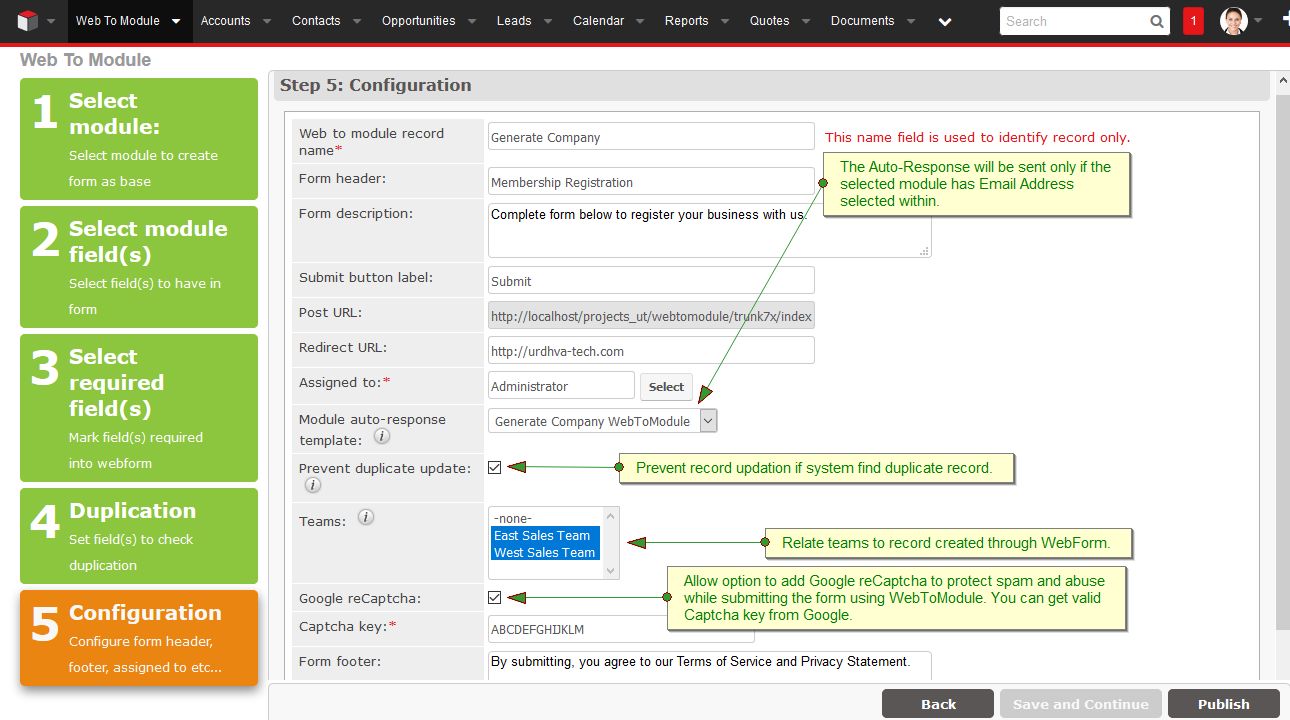
Step 6 : Preview your form and change contents before you publish.
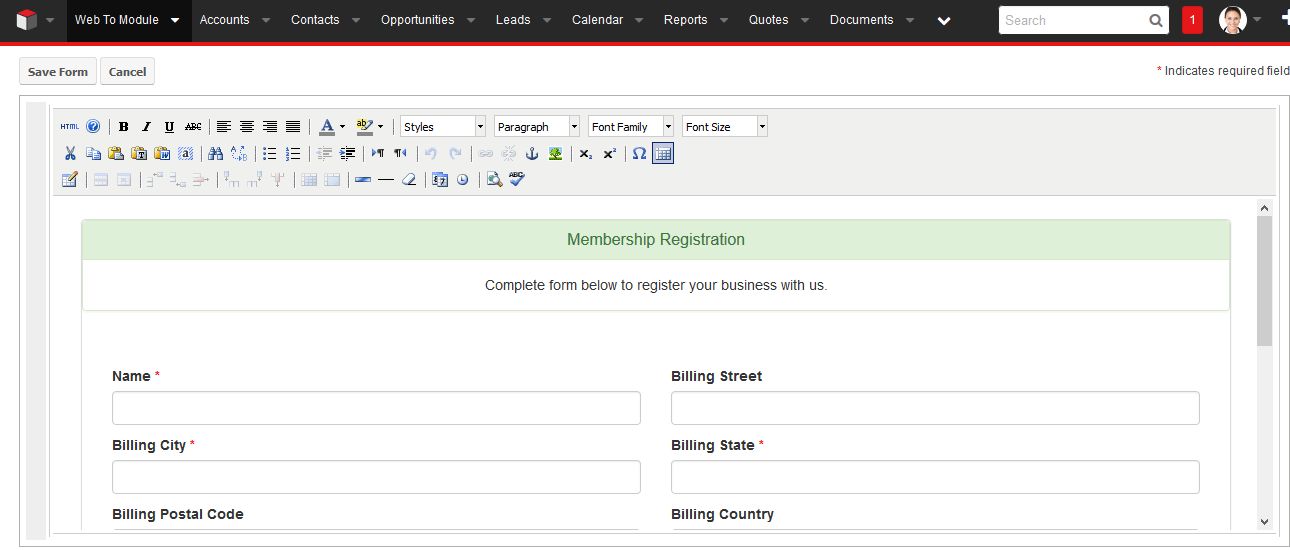
Step 7 : Download the WebForm from ListView and DetailView.

Step 8 : In above WebForm creation steps we have selected Accounts module and its fields to be shown on form. Below is the generated WebForm.
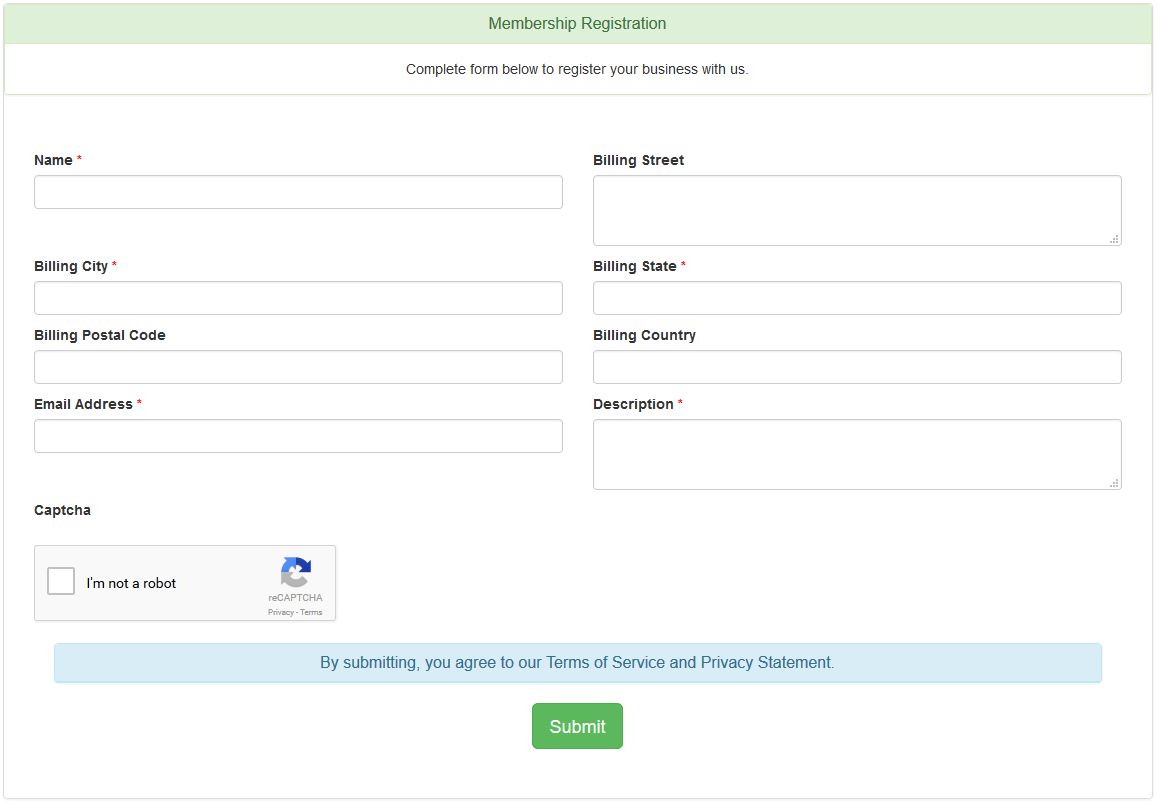
Step 9 : Form validations are fully HTML5 based.
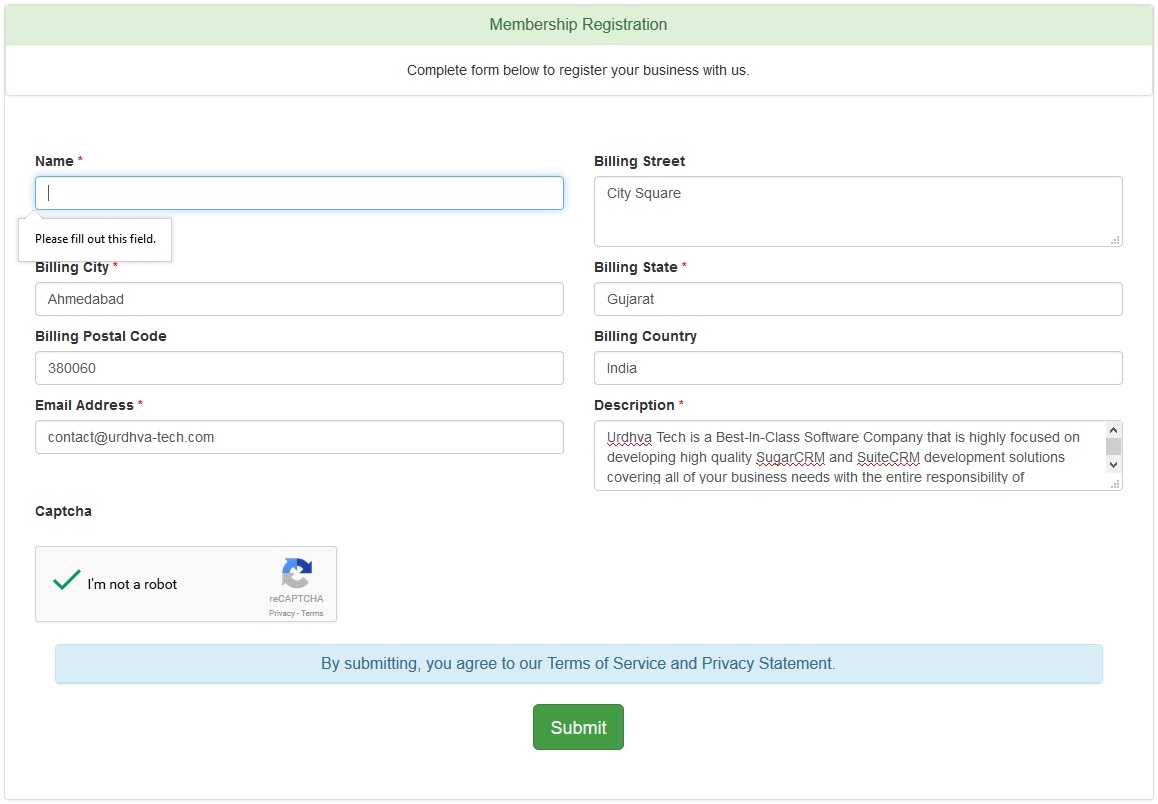
Step 10 : Sample of the Captcha validation.
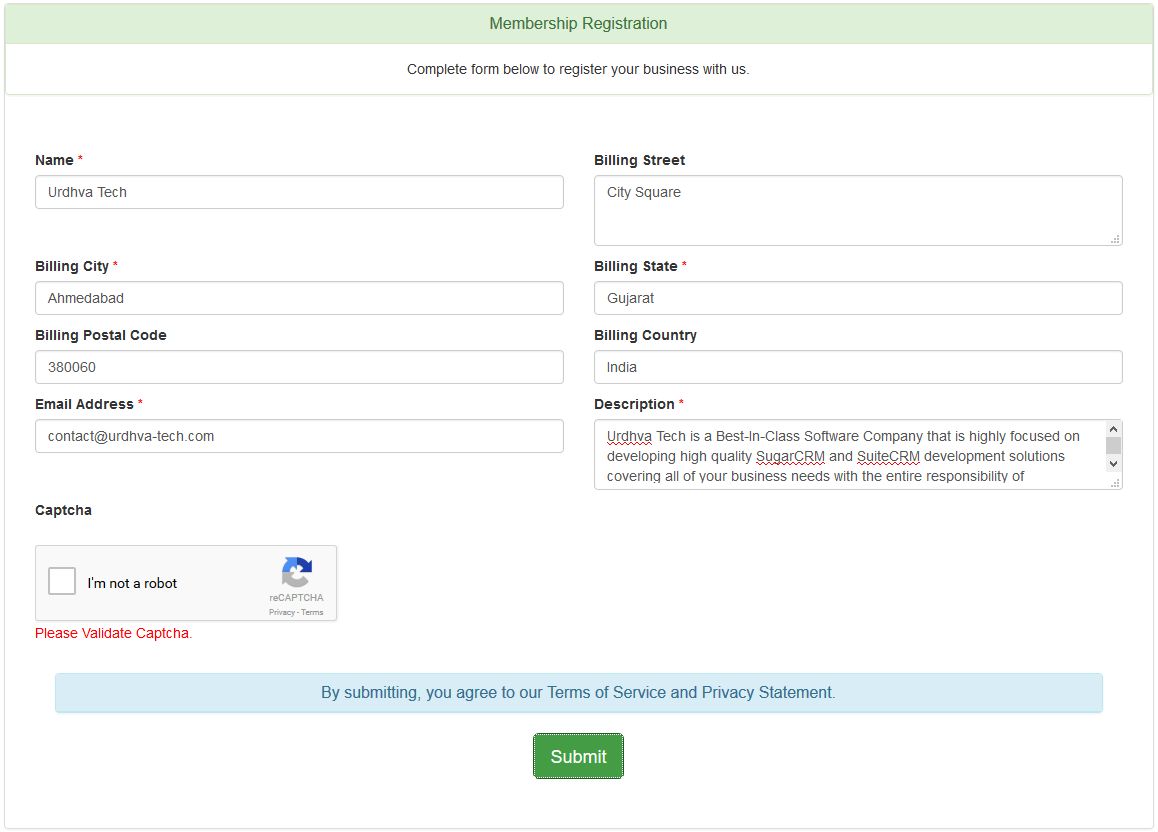
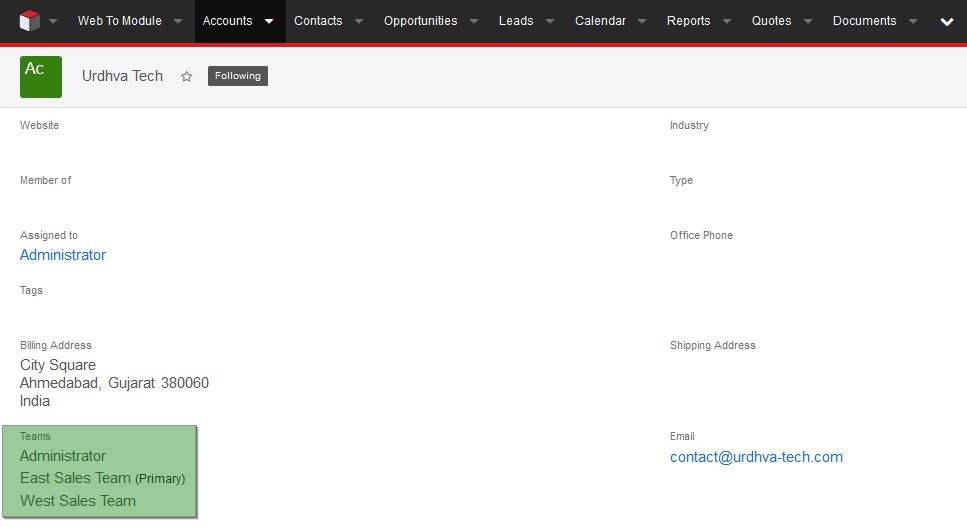
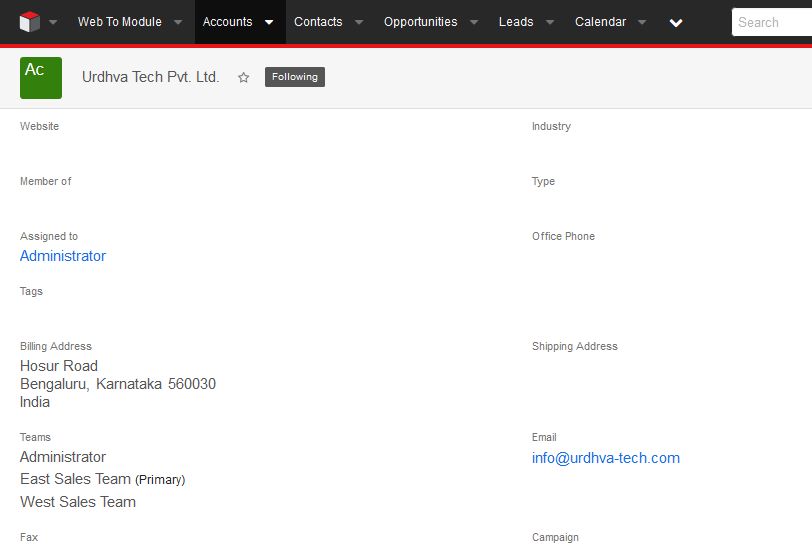
Step 11 : After Submitting the WebForm, Account record has been created in CRM. Selected "Teams" has been assigned to record.
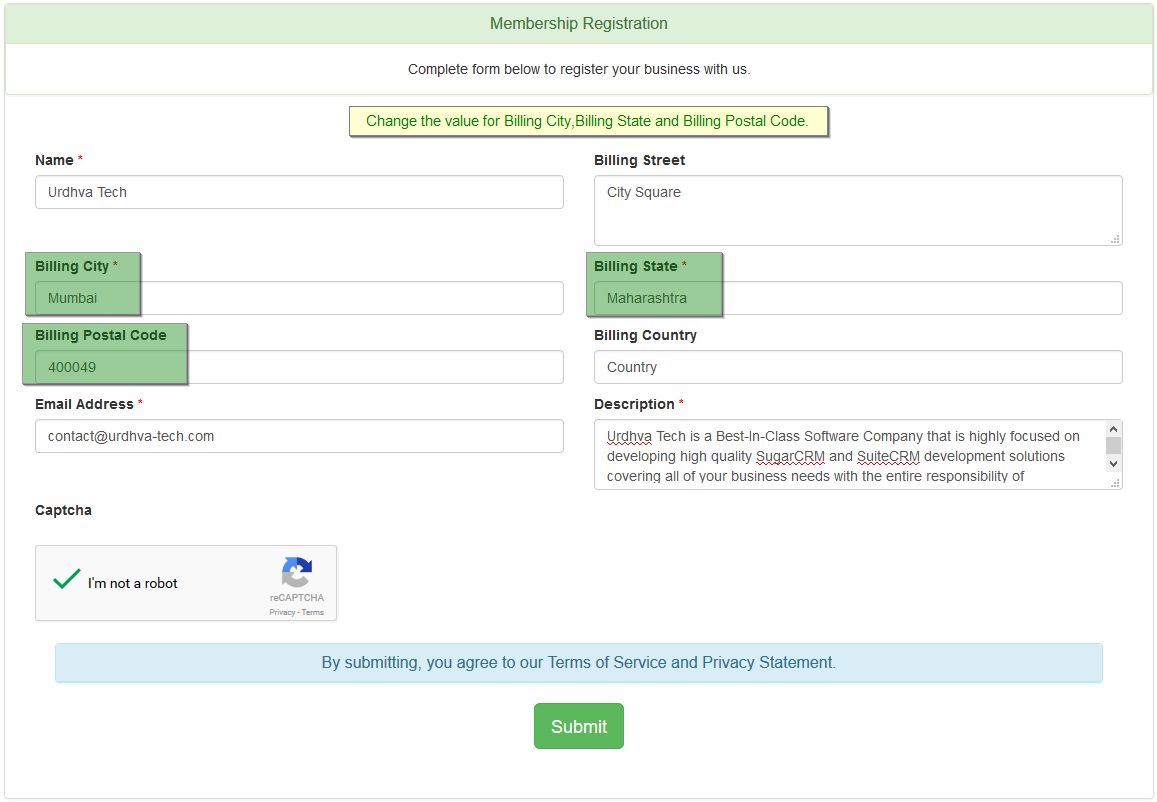
Step 12 : While creating the WebForm, We have selected Name and Email Address field for checking duplication. If record exist then it will update else new record will be created in CRM. Look at below, value has been changed for Billing City,Billing State and Billing Postal Code.
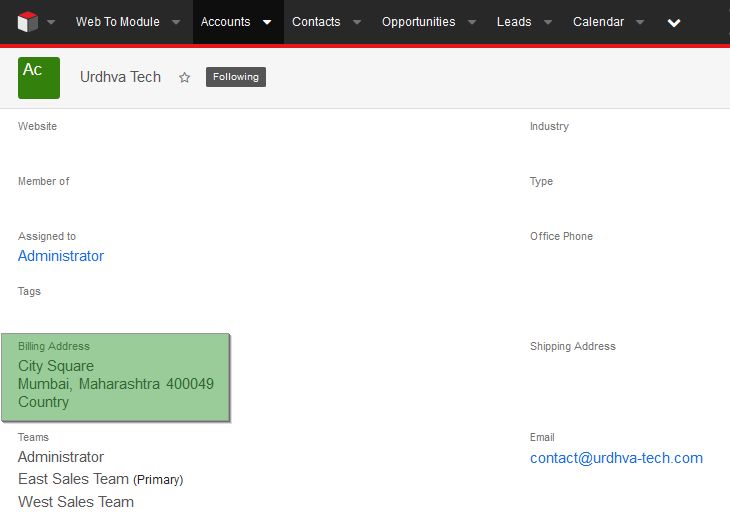
Step 13 : After form is submitted, Account record has been updated as follows.
Step 14 : Let’s provide different Name and Email Address into Webform. Now new record will be created into CRM.
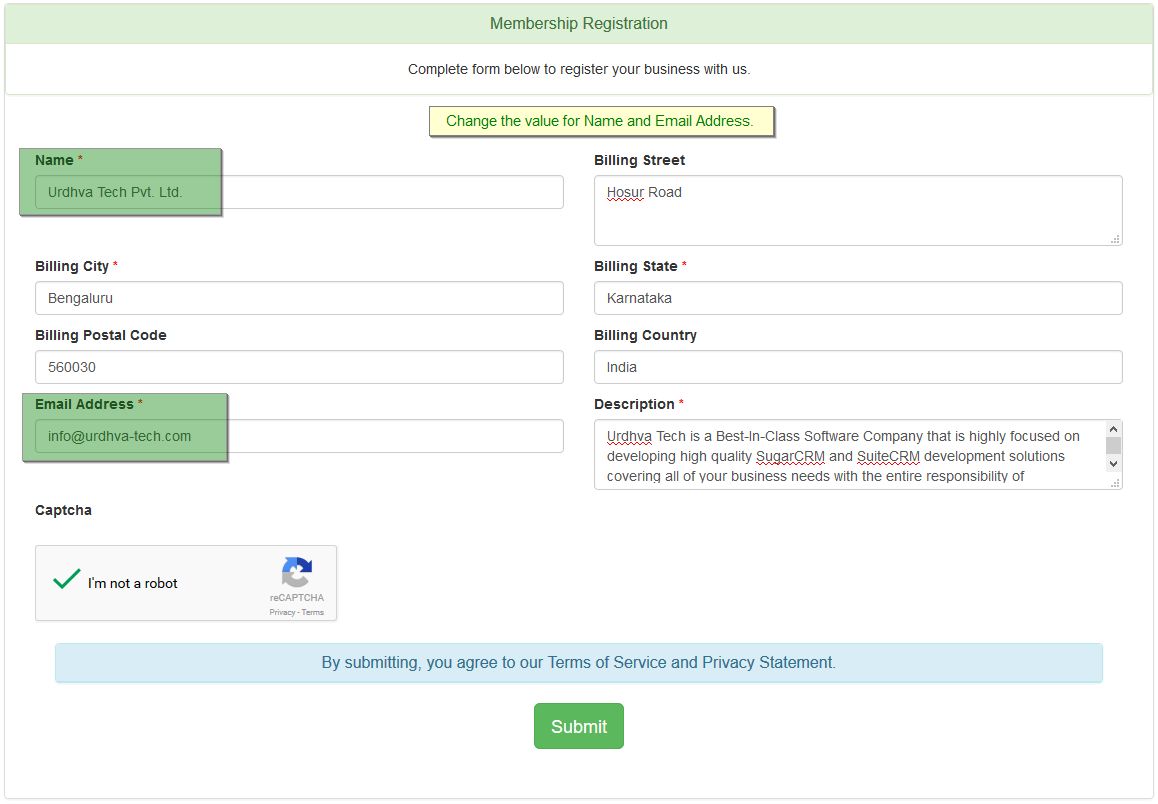
Step 15 : New record will be created into CRM as there is no duplication.
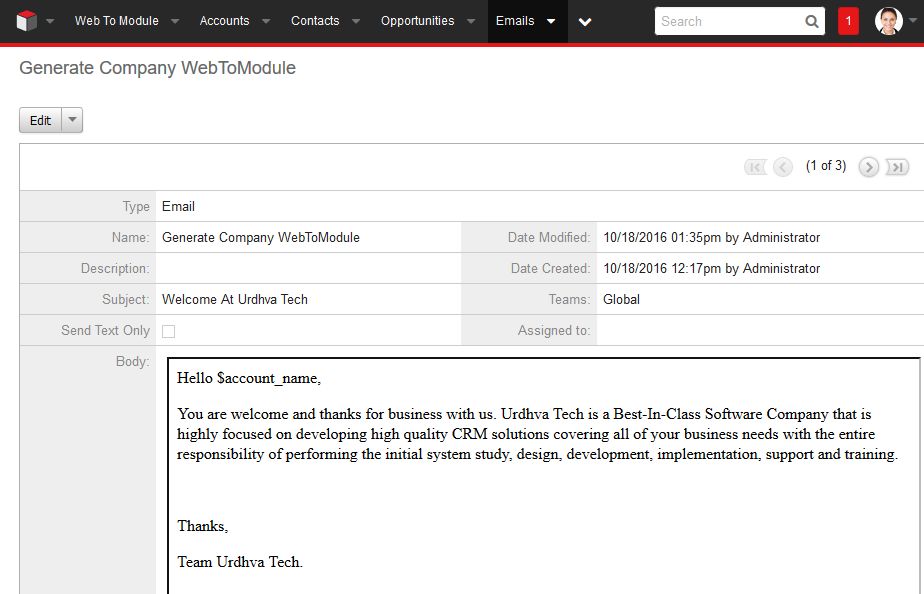
Step 16 : While creating the WebForm record, We have selected the Auto-Response Template “Generate Company WebToModule”. Also we have provided the valid Email Address while Submitting the form. So once record is saved, auto generate email will be sent to provided Email.
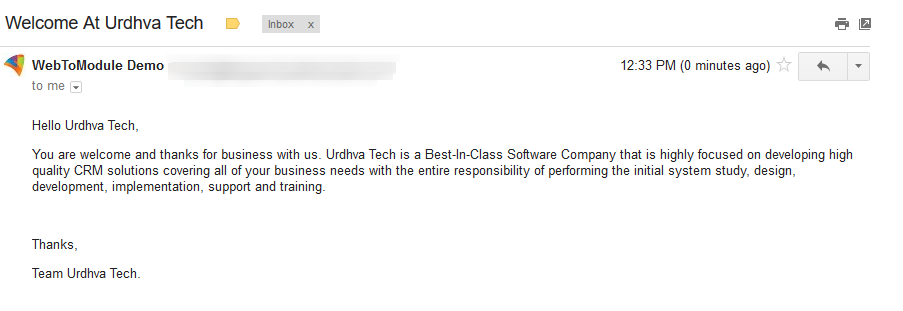
Step 17 : The email received by the visitor.
Comments
- No Comments Found.

